Posted on 2 Comments

Start Kitesurfing In Waves With A Surfboard

Kitesurfing in Waves

Kitesurfing in Waves

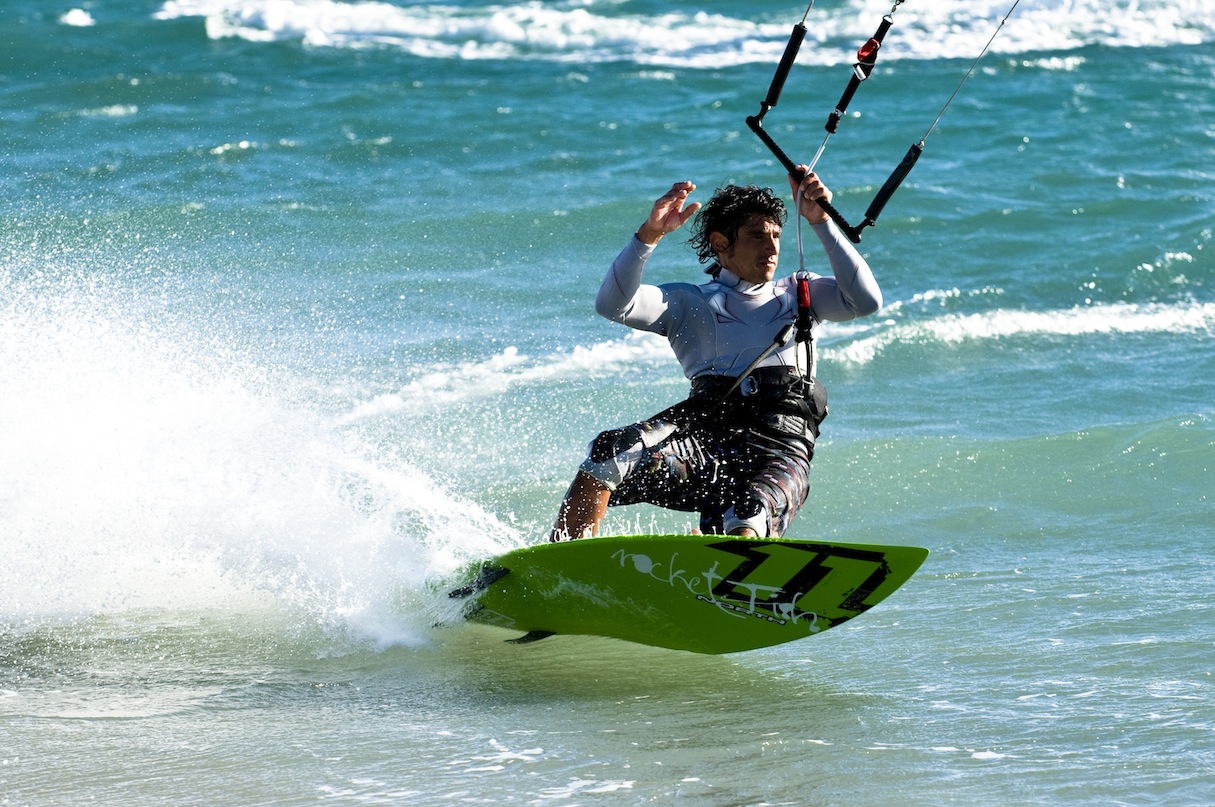
Nothing in the world quite compares to the feeling of catching your first wave. The surge of power through the board, the moment of silence when all that exists is you and the water, the thumping crash as you lean slightly too far and it all goes horribly wrong…or is that just me?

Wave riding requires a very different skill set to riding a twin tip board. Firstly there is the obvious difference between the shape of the board, which makes just riding up and down a very different experience. However wave riding also requires a different mentality – patience, aggression, harmony and sheer balls all have their place here. But the main feeling any long time wave rider experiences while surfing is a oneness with the wind and waves on a very spiritual level.

Surfing is damn hard

Surfing waves (in the traditional sense) is hard. Mainly because before you can actually get on the board and riding you need to learn how to ‘pop’ or stand up on the damn thing… which as you’ve probably guessed, isn’t that easy. One of the major advantages of kite surfing in waves is that you’re already stood up (most of the time) and so can forgo this painful process and just concentrate on having fun on the wave. Once on the wave the skill set required is so similar that many professional surfers are learning to kitesurf to give themselves more time riding thus improving their surfing performance. This means that if you do decide to take up (traditional) surfing, once you can get yourself stood up on the board the rest should be effortless.

Get out there

So now you’re all excited, how do you get started wave riding? While twin-tip boards can be used to sail on waves, they generally lack the volume to actually ‘catch’ a wave. This means that the easiest and probably the cheapest way to get started down the path of wave mastery is to simply dig out an old surfboard (or buy one cheap). You certainly do not need an expensive kite surfing surfboard to start having fun on the wave, any old surfboard will do. Personally I started an 8 foot mini-malibu board and I’ve seen guys taking out 10 foot Stand Up Paddle boards before. Of course you can invest in one of the specialist kite surfer surfboards and it will certainly make your ride more pleasant. But this is not a necessity for the beginner.
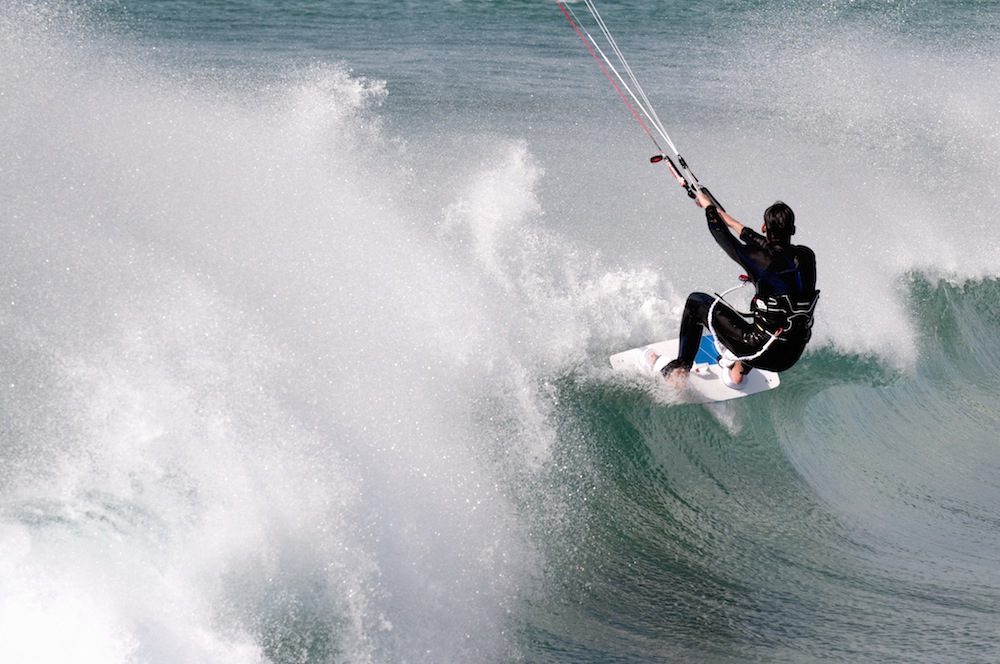
Wave Boards are very different to Twin Tip Boards

Getting on a bit?

Possibly the greatest advantage (at least to those getting on a bit) is that wave riding is not as physically demanding as freestyle. Now before we have an uprising, I’m not trying to say that you don’t have to be physically fit to wave surf…obviously you do, and the guys that ride big waves are amongst the fittest athletes on the planet. However surfing (on smaller waves) will not pull arms out of sockets as easily as handle passing will and is still a hell of a lot of fun. For this reason it’s not uncommon to see guys and girls of 60 + rocking up at the beach with their kite on their back and their surf board tucked under their arm, checking out the swell.

Adventure

Waves are generally shy creatures and like to stay out of the public eye, for this reason great wave spots have a tendency to be remote. Often just finding them requires a sense of adventure and a love for the wilderness. However the effort is nearly almost worth it, some of the most beautiful kite surfing spots in the world are wave destinations. Remote secluded bays with no one for miles, with just the surf and the wind (and occasionally your kite) pounding on the beach.

What…no Foot-straps?

One of the biggest concerns people have with wave riding especially when using an old surfboard, is the fact that they are often riding strapless (dedicated kite surfing surf boards do come with straps but many choose to remove them). This initially does take a little bit of getting used to. Once you’ve cracked it, it is a liberating and exhilarating feeling, which many claim is actually easier than riding with straps. The main difference comes when water starting. Given the extra volume and length of the surfboard it has a tendency to skew up wind whilst attempting to water start.

For this reason whilst water starting you need to pull in your back leg whilst pushing away with your front to force the board to point in a downward direction. I know, I know… this is exactly what you do on a twin tip, but believe me you have to really pull and push on a surf board, the longer the board the more exaggerated you have to make this.

Once you have mastered this technique actually riding is incredibly easy as the opposing forces of the wind and water actually glue you to the board (as I’m sure you’ll discover whilst you’re riding in very choppy conditions, this isn’t always 100% true, it is however, a well intentioned lie!).

Waves are big old boys…
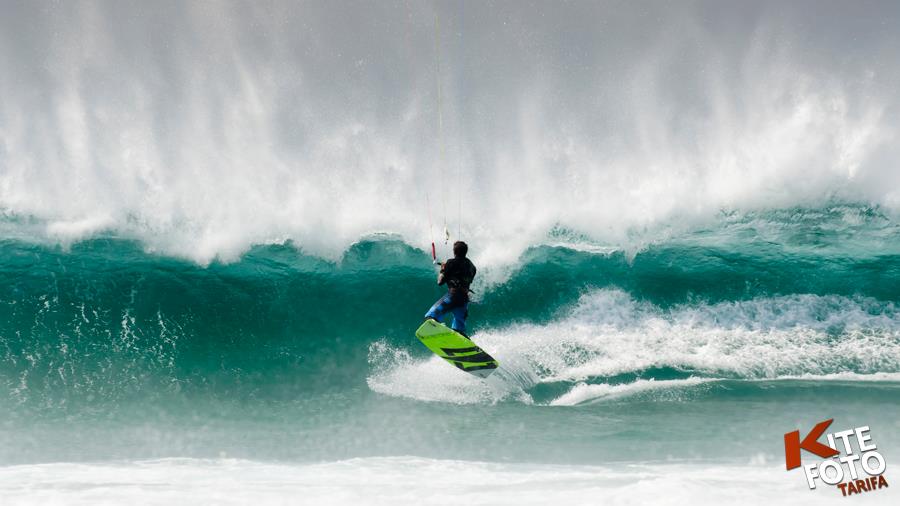
Tarifa gets angry

There are no 2 ways about it, these guys can pack a punch. Under estimating the conditions or over estimating their own abilities are the biggest reasons for failure, embarrassment and injury amongst the newbie wave rider. The waves themselves have a tendency to sort the wheat from the chaff. As a simple rule if you can’t get out through the waves, you’re not good enough to be out there.

Many people new to wave riding may not have a clear idea of how powerful waves can be, even what would be classed as a small, 1m wave can have an incredible amount of power. Definitely enough to pick you up, dump you under and ditch you unceremoniously back on the beach with your kite wrapped around you. Definitely not a good look, and not one you need to experience, if you give the conditions the respect they deserve. Talk to locals, find out about local conditions, discover when high tide is, are there any rip tides or other hazards you need to be aware of? All this will boost your confidence and your ability to cope once you’re in the impact zone.

Making Friends With The Locals

Surfers are a territorial bunch but generally if they see you treating their spot with the respect it deserves…and a large part of this is taking the time to talk to them and garner some of their wisdom, they’ll help you out. If you just rock up at a spot, unfurl you kite and tear up the wave they’re waiting in the line up for, showing them no respect…expect pain.
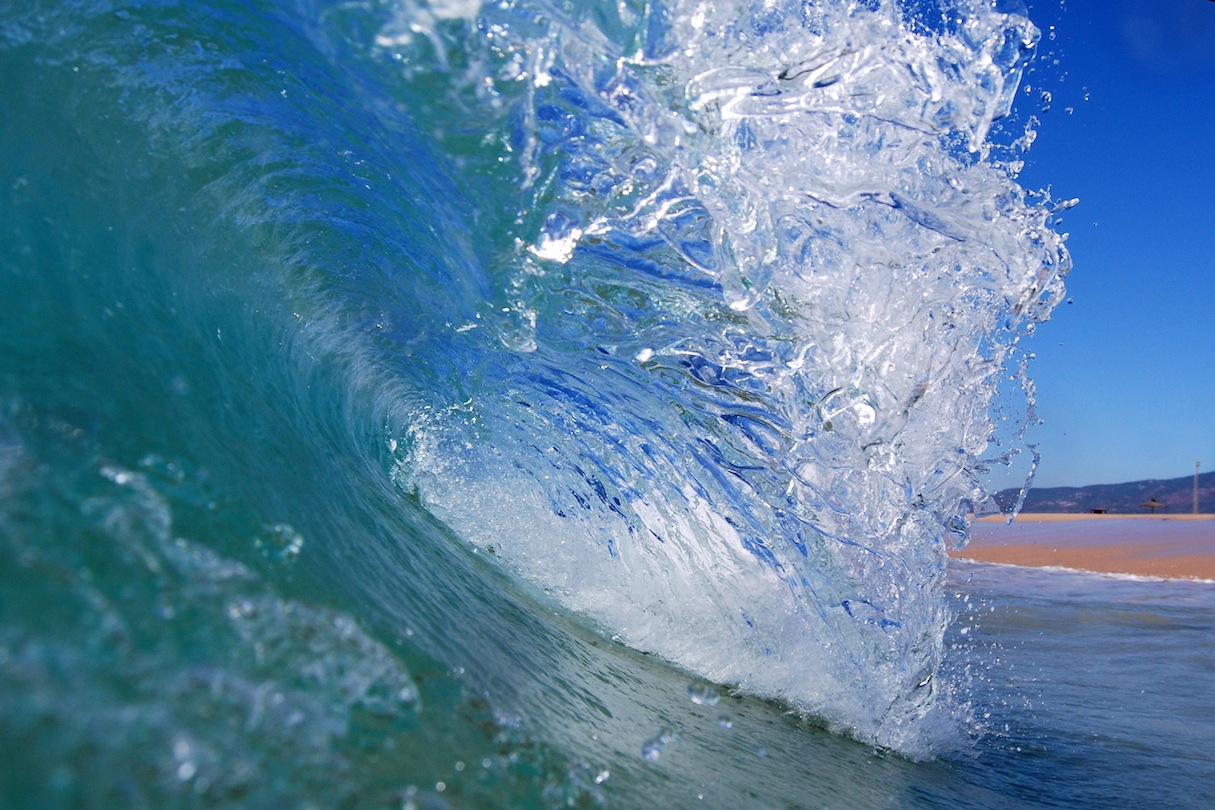
The Tide

Save Cash

Even if there are no waves having a surfboard in your quiver can give you other unexpected advantages. Because of a surf boards increased volume (floatiness), it will ride through lulls in the wind much more easily than a board of lesser volume and so can get you riding in much lighter winds. Thus armed with a surfboard and a twin tip board you can generally get away with less kites in your quiver than if you had just a twin tip, maybe needing only 2 kites to cover the same wind range as you would with just a twin tip and 3 kites. Boards cost less, get damaged less easily, and retain their value better than kites.

Posted on 2 Comments

The 3 Type’s of Wind & What They Mean For Your Kitesurfing

There are 3 different winds which we need to be aware of when kitesurfing. The 1st of these is the true wind, then we have induced wind and finally the apparent wind.

To best explain these let’s use a little example:

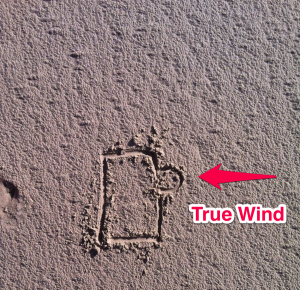
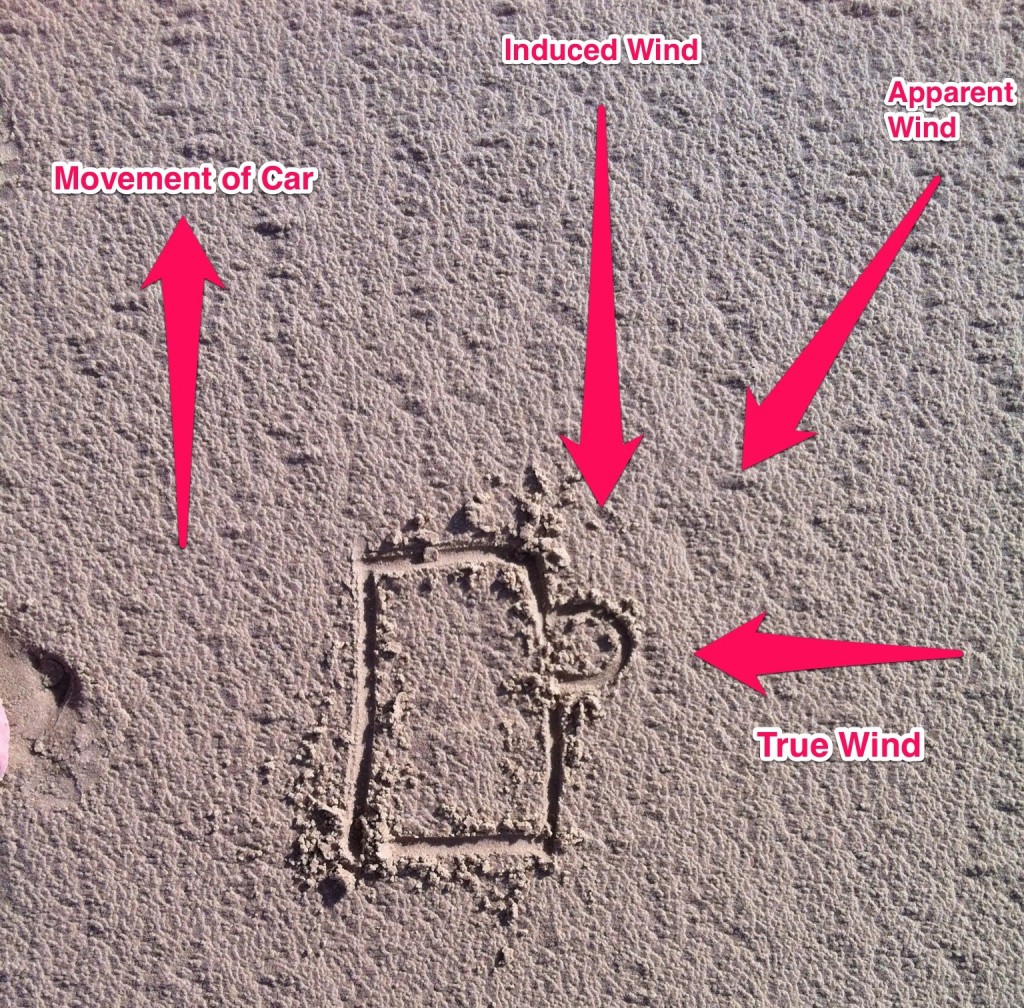
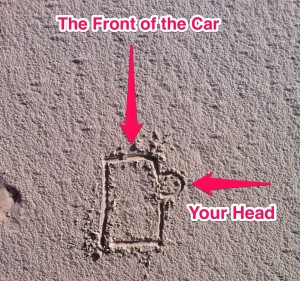
Imagine you are sat in a stationary car with your head sticking out of the window. The wind is blowing at a 90° angle to the car. This wind that you feel in your face while the car is stationary is what we call the true wind. That is it is the actual direction the wind is blowing in.

Induced wind 1
True Wind

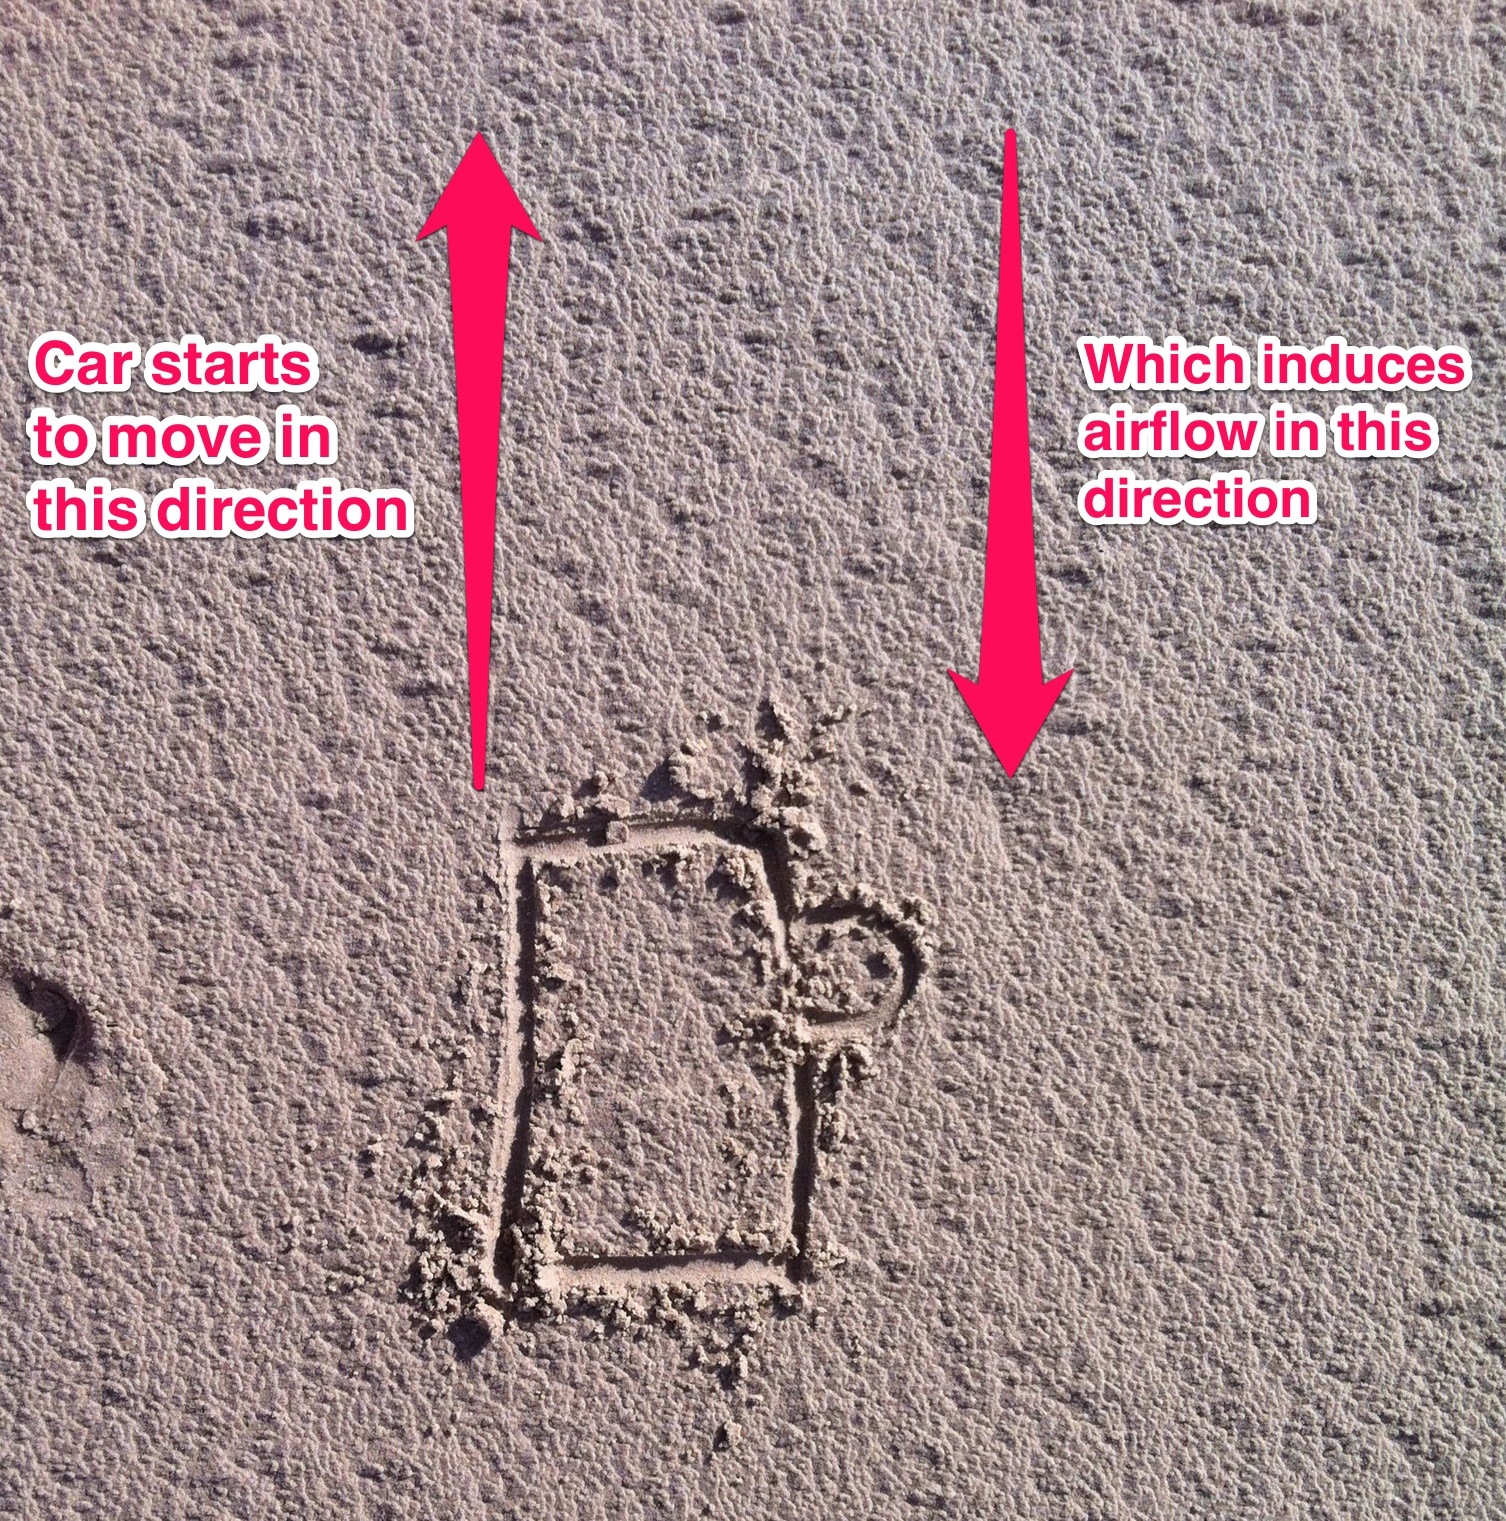
Now imagine that the car starts to accelerate slowly. As the car moves through the air, air flow is induced over the car in the opposite direction to which it is moving. This wind, created by the movement of the car through the air is called the induced wind.

skitch_3

At this point the laws of the universe had a problem. As it realised the wind couldn’t come from 2 directions simultaneously. So what happens instead is these 2 winds combine to form what is called apparent wind.

Apparent Wind

This is the wind you will feel on your face as the car is moving. So as the car speeds up you will sense the wind coming from nearer to the front of the car (in the direction of the induced wind), as the car slows down the wind will move back towards the position of the true wind. Apparent wind is basically a combination of induced and true wind, and depending on which one of these is stronger (ie if the car is moving faster than the true wind or vice versa) will influence the direction you feel the apparent wind coming from.

How This Applies To Kitesurfing

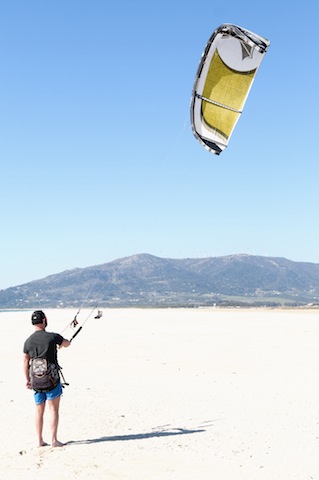
When riding in kite surfing the kite flies on this apparent wind. Because we are now moving over the water and the kite is moving with us, we are inducing airflow over the kite, this combines with the true wind which leaves the kite flying on apparent wind.

Still with me?

What this means in effect is that the faster you go on a kite the more the apparent wind shifts to be coming from a direction directly in front of you. This means that your wind window shifts further and further behind you as you speed up more and more.

It is for this reason that many beginners believe the while kite surfing the kite sits in the power zone. As this is often where the kite appears to be from the beach (as when your stationary the wind window does not move as the kite is always flying on true wind). However while riding the kite ALWAYS sits at the very front edge of the window. Obviously the faster you go the further back this front edge of the window will be as the apparent wind shifts further and further in front of you.

Imagine for a moment that you were going very fast. The apparent wind will be coming from almost directly in front of you and so the front of the window will be almost 90° downwind of you. This means that all the pull from the kite is in a down wind direction. This is why to go upwind we must ride slowly. By slowing down we bring the apparent wind closer to the true wind (ie further behind us) and the wind window moves back around in front of as (similar to how it is on the beach when we are stationary) this allows the kite to sit at the front of the window very close to our intended direction of travel. This way rather than the kite pulling us off downwind at breakneck speeds the angle of pull from the kite and our direction of travel are very similar.

This is quite complicated concept to get your head around, and to be honest isn’t essential  for your kite surfing ability. However by understanding this you’ll be in a much better position to self analyse mistakes made as you progress in your kite surfing career.

Posted on Leave a comment

One Handed Body Dragging

One Handed Body Dragging

Once you are back at the beach having mastered this, walk back up the beach with the kite at 45 degrees but this time try to use only one hand to control the kite.

If the kite is on the right hand side of you, you should fly it with your left hand, if the kite’s on your left, use your right. This way you have much more room to manoeuvre and don’t end up constricting yourself by having your elbow fighting for space with you hip. Your hand should be in the middle of the bar with your fingers being split between the index and 1st finger (or 1st and 2nd finger depending on what you find more comfortable). I like to have 3 knuckles on the ‘up’ side of the line with my index finger straight and my thumb opposing it underneath the bar. If at any point you feel yourself losing control of the kite go back to controlling it with 2 hands.

The idea of flying the kite 1 handed is that you do not have much leverage over the kite and so cannot move it too much. Whilst flying the kite with one hand we are attempting only to hold it in position, we do not want to move the kite too much with one hand and indeed if you find the kite moving quite a bit you will most likely have to go back to 2 hands to hold it in place or arrest its movement. For this reason make sure the kite is still at 45 degrees with 2 hands on the bar and then when you’re happy the kite is stable move to control it with just one hand.

NOTE: If at any point you lose control of the kite whilst flying it one handed immediately go back to control it with 2 hands.

OK so you’re happy steering using the kite whilst in the water and flying the kite 1 handed whilst on the beach. From here we can move on to combine the 2 in yup you guessed it, flying the kite 1 handed in the water.

The principle behind this is exactly the same as when we are flying one handed on the beach. With one hand on the kite you cannot move the kite too much (which actually helps in this exercise where we are trying to keep the kite still) This means if at any point you do lose control of the kite whilst in the water immediately go back to 2 hands to bring the kite back under control.

So back into the water and simply repeat the last exercise with one hand. Start to body drag and when you moving along in one direction with the kite stable at 45 degree move from 2 hands down to one hand with the same grip we had on the beach (ie kite on the left use your right hand and vice versa). When you want to change direction go back to 2 hands bring the kite through 12 o’clock onto the other side of the window, stabilise the kite and then move to one handed flying.

Again practice this exercise until you’re happy you can control the kite in both directions one handed.

Posted on 1 Comment

Trimming An LEI Kite


So if you are anything like me, trimming the kite can sometimes be more than a little bit confusing, should you pull this or pull that, connect here or connect there? Conditions are different every day so just because you trimmed your kite one way today doesn’t mean you’ll have the same setup tomorrow.

Fear not…we’ve sweated this one out over the years and this article is the sum of our mistakes and insights, simplified to a level that actually makes sense (hopefully…if not let us know in the comments and we’ll clarify!).

The aim here is to give you the basic knowledge to start trimming your own kite effectively.

Not to delve deep into aerodynamic theory.

For that reason and for any aerospace engineers out there, we are at times over simplifying reality slightly…this is done intentionally to avoid having to go into too much complex theory and enable us to get across the basic concepts in a format that you guys can actually use and apply. So if, after reading this and doing some deeper research, you find that we have bended the truth a little, please understand that it is the concepts we are trying to get across, not Einsteins theorems.

Why Trim Your Kite?

The most basic reason we trim our kite is to change the power in the kite. To ensure that it is safe and flying efficiently for the weather conditions of that day. Our aim is to be able to handle the kite safely by trimming it to a level of power we can handle, thus ensuring the kite flies properly and doesn’t fall out of the sky at the first lull in the wind, or rip us off down the beach the second we put it up.

Obviously every kite handles differently and there are many different types and makes of kites that all require their own trimming techniques. But the science behind them all is the same.

The Trim Strap

Trimming Using The Trim Strap

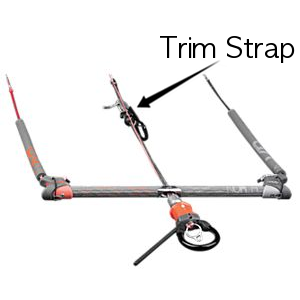
The first method we will look at is trimming the kite using your trim strap. Trim straps can be located above or below the bar but all function in the same way. The trim strap can be adjusted to give more or less power and works by changing the length of your front (centre) lines.

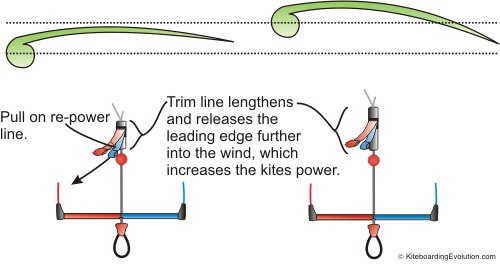
By pulling the trim strap you are changing the angle of the kite relative to the wind. This is called the angle of attack (AOA).

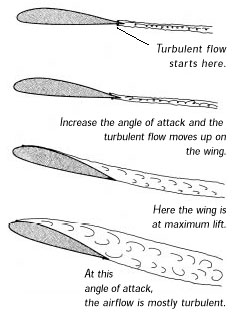
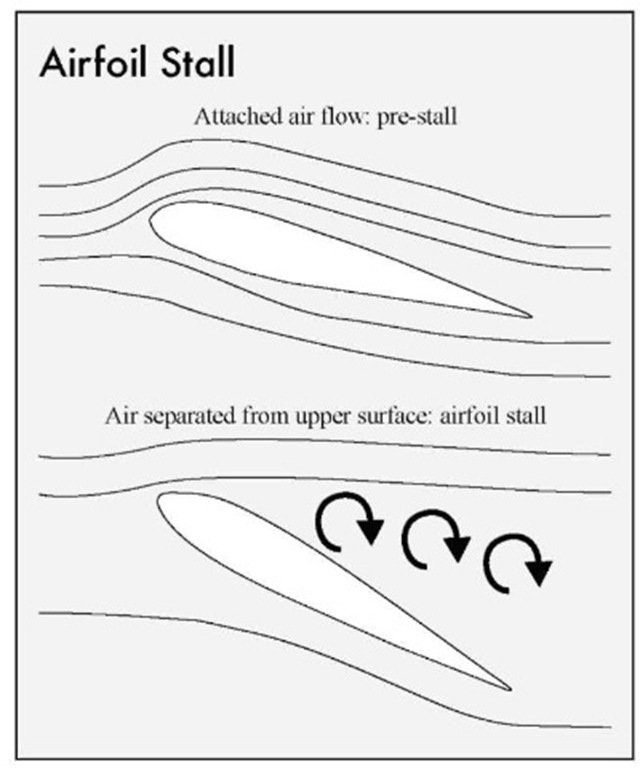
Imagine the position of the kite above your head when it is at 12 o’clock. If you shorten the front lines you are effectively pulling the leading edge down towards you, lifting the trailing edge. This will (in optimal conditions) change the angle of attack of the kite meaning that the air flow over it is less efficient (more turbulent), thus decreasing the power.

So to power up the kite again, it is the opposite. We lengthen the trim tab which lifts the leading edge up away from us, lowering the trailing edge and ensuring that the kite is splitting the oncoming wind like a knife, giving us smooth (laminar) air flow over both exterior surfaces of the kite. Increasing the lift generated by the kite.

trimstrap

Image Courtesy of KiteboardingEvolution.com

I find the easiest way to think of this is in terms of the outside/back lines as we all know what effect they have on the kite. When you pull the bar in you know that you are powering the kite up (as long as you don’t over sheet in which case it stalls…more on that later) In terms of what you are doing with the lines, you are effectively shortening the outside lines, as they get shorter in comparison to the fixed centre lines.

So as we shorten the outside/back lines, at the same time we effectively lengthen the centre lines (in comparison with the back lines) which is the same effect as letting the trim strap out, which as we know, powers the kite up.

This is a real long winded way of explaining this but I find it the easiest way to consistently get a good understanding of trimming, but please, take a moment to visualize this and check you’ve got it.

Conversely as we let the bar out, we are lengthening the outside lines, which implies we are shortening the centre lines (or pulling the trim strap in) which has the effect of de-powering the kite.

This is how my poor brain keeps track of whether I should be pulling the trim strap towards me or letting it out, by comparing it to an effect I am sure of…that of pulling the bar in or letting it out.

Kite Angle

Testing The Kite For Power

When we’re teaching, something we do every time before we let a student fly a kite, is launch the kite and fly it at the 12 o’clock position. From here we pull the bar all the way in and hold it there. In doing this we’re checking to see if the kite starts to stall. If the kite immediately starts to fall out of the sky, backwards, then the back lines are too short, i.e. the kite is over-sheeted, the angle of attack is too acute and the airflow over the kite is too turbulent to allow it to generate enough lift to stay in the sky. Think of a plane trying to fly directly upwards without enough power.

The kite should sit in the sky comfortably for a good few seconds, or preferably for ever, before it starts to stall if it is trimmed correctly. Note, when pulling the bar in, the kite will (most likely) shift back a little bit in the window, as long as it holds this position and doesn’t continue to fall, all is good.

Word to the Wise

On light wind days or when highly under powered a kite will stall even if well trimmed as it is impossible to trim a kite correctly outside of its wind range.

Trimming Using The Kite Lines

If once we have used the trim tab, the kite is still not correctly trimmed then we have to look at changing the points at which the outside/back lines attach to the kite. By attaching the lines either closer or further away from the kite we can set the kite for more or less power. The shorter we make the back lines, the more powerful we are making the kite (the same as pulling the bar in). Conversely the longer the back lines the less powerful the kite will be (letting the bar out). It works along the same principle as the trim tab, lengthening the back lines changes the angle of attack, decreasing the power in the kite.

Testing The Kite For Steering

When we test fly kites on the beach, we are also testing the steering. The back lines (outside lines) control this, as these are attached to the wing tips of the kite and effectively steer the kite.

With the bar at the sweet spot (the point where you can just feel resistance from the bar when using only the weight of your hands and arms to set the kite) the kite’s steering should be reactive. If the steering is too quick or too slow then the back lines will need adjusting. The longer we make the back lines the slower the steering will be. The shorter they are made, the quicker the kite will turn (up to a point, but I’ll leave you to play around with this one).

Ready to be really confused?

This is where things get a little crazy. We would think, given what we’ve just said that the answer to light wind days is simply to shorten the back lines to give us more power and away we go.

If only things were that simple.

By shortening the back lines in light winds we also make the kite that much more susceptible to back stall, which due to the lack of power from the wind will happen that much sooner in light winds anyway. Often this occurs to the point where if we shorten them too much, we can’t even launch the kite as it’s so over sheeted. As a result sometimes on light wind days we have to de-power the kite (i.e. lengthen the back lines/shorten the front lines) more than we would think to prevent over sheeting and allow the kite to fly.

Kite Back Stall

Brain Fried?

This is very much an art not a science and the best way to get your head around it is to go out and play, just spend 2 mins every time you go out, playing with the trim strap until you get a good idea of what it is doing and how it effects the kite, by doing that and applying the logic in this article, you should get this nailed quick smart.

REMEMBER, if you have trimmed your kite and have completely powered up or de-powered depending on what the conditions are and it still isn’t enough: CHANGE KITES! Trimming is not a replacement for correct kite selection.


Want To Learn More?

Learn to Kitesurf in 1 Week GUARANTEED with our Learn to Kitesurf Camp in Tarifa.


Posted on 2 Comments

Why Would You Use Short Lines When Kitesurfing?

Short Lines


Short Lines

One thing that will define the way you learn during the online lessons and will contribute to keeping you safe and giving you more practice of the fundamentals than would otherwise be possible is your use of short lines.

We recommend, actually I would insist however I realise that trying to insist on anything over the internet is futile…but if you actually want to crack this kitesurfing lark I would implore you listen to the advise I’m about to give and continue with this course on short lines.

Normally kites fly on lines of between 20 and 25 m. This length ensures the kite generates enough power whilst retaining enough responsiveness to be useful on the water in normal winds. As you should know by now kites generate power as they move across the wind window, due to the action of apparent/induced wind. By reducing the length of the lines we reduce the potential power the kite can generate as we reduce the distance it can travel (and thus the speed it can gain). A stationary 9m kite on 25 m lines will have the same power as a stationary 9m kite on 5m lines (unless you want to be picky and talk about gradient wind…which I don’t!) however the kite on 25m lines has the potential to generate a huge amount more force as it has the potential to move through a much larger plane. Someone cleverer than me could tell you exactly how much more power such a kite would generate…suffice to say it’s LOTS!

Thus by reducing the length of the lines we reduce the potential for you coming to harm by messing something up…which you will (everyone does). This means that you can practice which whatever kite you have and by performing a simple operation can turn it from an out of control power machine into a child’s toy. Considering we don’t actually need any of that power until we are actually up and riding on the board you can save yourself a lot of frustration (and pain) this way.

Added to this is the fact that short lines tend to tangle less, simply due to the fact that there is less line to get tangled. This alone can save you hours during your initial sessions and means that your time spent at the beach is much more profitable. At Tantrum Kitesurf we noted that by putting students on short lines we would increase the number of runs they had in a 5 hour session (sharing a kite) from 6-7 runs to something nearer the mark of 25 -35. Thats a lot more time spent practicing piloting the kite rather than untangling lines (which you’ll do plenty of over the course of your kitesurfing career anyway!).

Last but definitely not least a kite on short lines is a lot easier to relaunch than a kite on longer lines, This is because the relative angles of the lines to the kite is that much greater that every movement of the kite has much more effect on the steering of the kite. For this reason the kite will be a lot more responsive, which actually leads to a sensation whereby when you do move up to longer lines you actually find it easier as you have more time to think about everything that is happening as it seems to be happening in slow motion.

I would recommend that you visit your local kite shop and ask them to cut your lines in several places. This does no damage or has any effect on the actual flying of the kite (as long as it’s done right), and actually gives you a lot more options to change the configuration of your kite when you are up and riding. I would recommend you to go for at least 7m and 15m cuts, so you’ll be able to fly your kite on 7m lines, 15m lines or full length lines. If you want to go the whole hog I would suggest 5m, 10m and 15m. This will give you a great range to progress through and these are the sizes we’ve had the greatest success with in our physical kitesurf school. Every case if different and your exact needs may depend on what size/type of kite you have…the Viron for example comes with the ability to shorten the lines, because of this and due to the friendly characteristics of this kite you don’t need to cut the lines any more for this kite.

However you finally do it, you’ll be helping yourself out massively by performing this one simple task. It shouldn’t cost too much and can save you time, frustration and embarrassment down the beach.